
Is your QuickBooks scheduled automatic backup fail and show an error message? Scheduling an automatic backup is the most suitable way to prevent your data from being lost. This is a common issue that many users face. We know that you don’t want to lose your important financial records, so we can help you. Read this article to know the reasons why QuickBooks scheduled automatic backup fails and its effective solutions.
Why QuickBooks Scheduled Backup Not Working in Windows
QB Scheduled backup failure can be a critical error as it can cause unexpected data loss. There are some causes we discussed here.
File Name Too Long: There is a character limit of not more than 65 characters for file name. If you exceed the limit you may face scheduled backup failure issue.
File Path Too Long: If your file locates under multiple sub-directories, then it can cause such types of error.
File Too Big: If the size of backup file is more than 3 GB, this may be the reason for your scheduled backup failure.
QuickBooks Database Server Manager Unavailable: If the QuickBooks Database Server Manager is unavailable, you can’t work properly from the workstation.
Outdated QuickBooks Version: If you are using an outdated QuickBooks version, this can be a primary reason for failing your scheduled backup.
Damaged Company File: Is there any damage in the company file or any data? If yes, it can be a primary reason for displaying the backup failure.
QuickBooks Hosting: If you enabled hosting for multi-user mode, then sometimes it shows such types of conflicts.
User Name Conflict: Sometimes problems arise due to the inappropriate configuration of the user name or password. It is not QuickBooks fault. The error may be caused by Windows User name and Password.
Improper Scheduled Backup settings: Maybe you have improperly set up Scheduling backup settings for QuickBooks.
How to Solve Scheduled Backup Issue in QuickBooks
Here we discussed some solutions to fix scheduled backup failure issues in QuickBooks. Follow the steps as per instructions to get rid of the error completely.
Solution 1: Run QuickBooks in Compatibility Mode
Follow these steps to run your QB in compatibility mode in the Windows version.
- Go to your system desktop, right-click on the QuickBooks icon.
- Select the Properties tab. Find the Compatibility tab.
- Mark the checkbox Run this program in compatibility mode for option.

- Click on the drop-down list and choose the Windows version.
- Hit the Apply tab and click on the OK button.
Solution 2: Install the QuickBooks Updates
Download and Install the QuickBooks updates to resolve the backup failure issue. Follow the given steps to do so.
- Open the QuickBooks and select the File tab.
- Click on the Close Company/Logoff.
- Under the File tab, click on the Exit.
- Go to Desktop, right-click on the QuickBooks icon.
- Select Run as administrator.
- If the No company dialogue box is available, go to the Help tab.
- Click on the Update QuickBooks. Under the options menu, mark the checkbox on all files.
- Select Save. Under the Update now option, click on the Reset updates.
Solution 3: Check the Scheduled Automatic Backup Setting
The wrong Automatic backup setting may cause backup failure. Follow the steps to verify your scheduled backup settings.
- Launch QuickBooks and go to the File tab. Click on the Save Copy or Backup option.
- Choose Backup copy and hit the Next button.
- If you haven’t set your backup defaults yet, click on the Options button and now select Next.
- Choose Change Location or Use this location (as per your choice), Select the Next once again.
- Mark the option Save it now and schedule future backups or Only schedule future backups and hit on the Next tab.
- At last, checkmark the option Save backup copy automatically when I close my company file every time. And write the number of times in the box and hit the Finish button.
Here we have a video suggestion for you, that will help you to create a QuickBooks backup correctly. Have a look;
Solution 4: Use QuickBooks Verify and Rebuild Data Utility
QuickBooks Verify and Rebuild data utility are the in-build tool that identifies the damaged company files. Further, it repairs the files automatically. Follow the steps to run tools.
- Open QuickBooks.
- Go to the File tab and click on Utilities.
- Select the Verify Data.
- Now QuickBooks scans company files for any error and corruption.
- If you get a message Your Data has lost Integrity, close the message.
- Click on the File tab. Select the Utilities option.
- Now click on Rebuild Data. Click on the Backup Company Data and hit OK.
- Take a backup of your company file on the desktop.
- Click on OK. Now QuickBooks Rebuild data tool will repair damaged data in the company file.
- When you get a pop-up message Rebuild has Completed, click on the OK button.
Other Useful Resources:
How to Reconcile in QuickBooks Online
Register QuickBooks Library Files Failed Fixed in new Method
QuickBooks POS Restore Backup Failed (Can’t Remove Logfile): Fixed
Solution 5: Rename the QuickBooks Company File
Rename the QuickBooks company file to Scheduled backup failure issue. Follow the given steps to change the name.
- Open QuickBooks and open Company File.
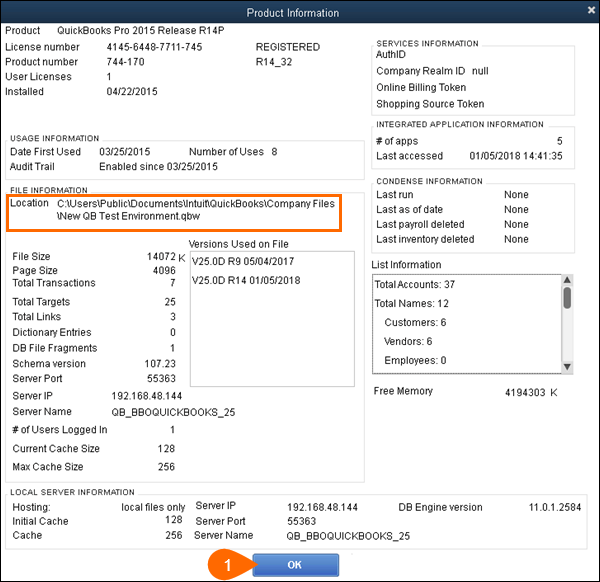
- Press F2 or Ctrl+1 key on the keyboard. Now it displays the Product Information Window.
- Go to the File Information Field and note Company File Location.
- Close the QuickBooks Error.
- Right-click on the Start button and click on File Explorer/ Open Windows Explorer. Navigate your Company File Location that You have noted.
- Right-click on the file, choose Rename, and enter a new name.
- In the end, hit the Yes button.
After following the above instructions, you need to setup QuickBooks to use the newly created company file. Follow the steps to do so.
- Go to the QuickBooks File menu and select Restore or Open an Existing Compnay.
- Select the Open a Company File option and hit the Next button.
- Click on New Company File Name and click on the Open button.
Solution 6: Backup the Company File on An External Flash Drive
To overcome with Schedule backup failure issue, you can try to back up the company file on an external flash drive. Follow the steps.
- Open the File menu and click on Backup or Save Copy.
- Choose the Backup Copy and hit the Next button.
- Select Local Backup and click on the Next button.
- Click on Save it Now and select Next.
- Browse to the company file location on the local drive and click on the Save button.
- Find the backup file on the local drive.
- Right-click on the Backup File and choose Copy.
- Open the Windows Explorer. Double click on External Drive.
- Paste the Backup File.
Solution 7: Check Available Storage space
When you have insufficient storage space to store the backup files it leads to schedule backup failure. You need to maintain a minimum space of 645106849 bytes to avoid scheduled backup failure. Remove your unnecessary files to clean up the space and check if the issue still persists.
Solution 8: Change the .ND File Name
Sometimes, changing the .ND file name can fix the scheduled backup failure. Follow the given instruction to change the file name.
- Close the QuickBooks and open Windows File manager.
- Open the path C:\Users\ Public\ Public Documents\ Intuit\ QuickBooks to view the network data file.
- The file name is the same as the company file and followed by .ND Extension.
- Right-click on the File and choose Rename.
- Type .OLD file extension at the end of the file name and save the file.
We discussed the scheduled backup failure reasons and their 8 solutions. Hopefully, you understand all the methods and fixed your scheduled backup failure issue. If none of the solutions is able to fix your issue and you still facing the same problem, you can contact our QuickBooks ProAdvisor. Get in touch by dialing our toll-free number +1-844-405-0904.