
Fix QuickBooks Error 20 & Activate Printer in QuickBooks
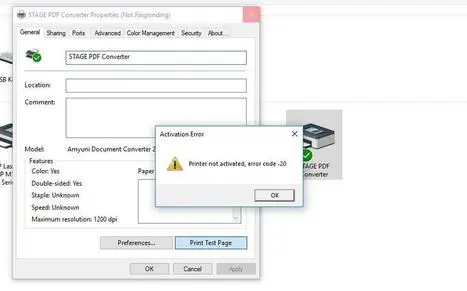
QuickBooks error code 20 nothing but an issue occurred during the time of installing or upgrading of Windows to the new version. This appear because of the deleted of KEY_CURRENT_CONFIG\ software key. Because of inactivate of printer in QuickBooks, the users faces a lot of problems such as paying bills, recording financial transactions, printing checks, etcetera with the highest proficiency. So here in this article, we will know, solutions to the error.
Before sharing the solutions, it will be good to know the root cause of the error, so that, we can apply the right solution to the error.
Why Printer not Activated in QuickBooks
Besides a mistakenly deleted key, many reasons can cause this error. Below is the list of all the possible ways of the error taking place.
- Registry errors with the Windows.
- A non-compatible version of your QuickBooks with the windows operating system.
- Your application key is old/not up to date.
- Corrupt or unfinished QuickBooks installation.
- Unsupported printer drivers.
Points To Remember, Before Solving the Issue
Before you head onto fix the issue, it is important to keep in mind the following factors.
System Restore Point: Before you begin, create a restore point for your system. Although the guide for the restore is labelled for Windows 10, however, the restore guide also tends to work on Windows 8, as well as, Windows Vista/7.
A Registry Back-up: In order to create a registry back-up you follow the below process:
- First, go to the Registry Editor.
- Then, select Computer from the left side of the folder tree.
- Now, click on File>>Export.
- Finally, select Save.
How to Solve QuickBooks Error Code 20
QuickBooks error code 20 can be resolved in many different ways, because we have the effective, and helpful solutions by which you can easily fix the issue in a short time. Have a look;
Solution 1: Edit & Update Register Key Manually
This manual update registration can be complete in 2 different methods, Here, in the below, we have given the 2 different methods. Choose any one of the method according to your need;
Method 1: Update by Using PowerShell Script
The update register key process through PowerShell script is only applicable for the Windows 10 users, so if you want to go through this procedure then make sure that you are a user of Windows 10.
Before beginning with the steps, the user must log in to their account for permission they will get access to the command prompt.
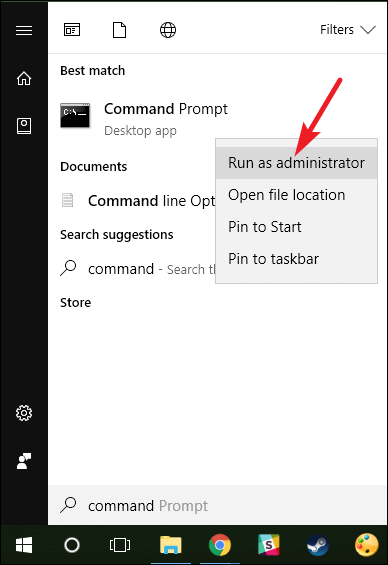
- From your Windows, click on the ‘Start’ button, and in the type bar type, ‘cmd’.
- After that, right-click on the cmd, and select the ‘Run as an administrator’ option, from the list.
- In the prompt command type, power shell, and press the ‘Enter’ key from the keyboard.
- Now copy-paste the below code on the command prompt.
PowerShell.exe -NoProfile -NoLogo -NonInteractive -Command “$key = [Microsoft.Win32.Registry]::CurrentConfig.OpenSubKey(‘Software’,[Microsoft.Win32.RegistryKeyPermissionCheck]::ReadWriteSubTree,[System.Security.AccessControl.RegistryRights]::ChangePermissions); $acl =$key.GetAccessControl(); $rule = New-Object System.Security.AccessControl.RegistryAccessRule (‘Users’,’FullControl’,’ObjectInherit,ContainerInherit’,’None’,’Allow’); $acl.SetAccessRule($rule); $key.SetAccessControl($acl);”
- After applying the code, the error will not appear for one more time.
Method 2: Update by Using Registry Editor
The registry editor process of the update is very easy, everyone can do this to solve the QuickBooks print error 20.
Follow the method to get permission through Registry Editor.
- Go to Windows, and click on the ‘Start‘ button.
- In the type bar, type ‘Registry Editor‘, and press the ‘Windows‘ key with the ‘R‘ key to run the dialog box.
- Type, ‘regedit‘ in the command box, and right-click on the regedity to choose the ‘Run as Administrator option.
- Search for ‘HKEY_CURRENT_CONFIG‘, and get access to the registry editor.
- Right-click on the software folder name, and choose the permission.
- And make sure that, you have full access to the table.
- Click ‘Ok‘, and close the window, and the registry editor.
Other Useful Resources:
PDF Repair Tool In QuickBooks: A Complete Guide
Solution 2: Reinstall QuickBooks And Update Windows
Reinstallation of QuickBooks is a primary method for all types of QuickBooks issue. So, we can use this solution to the QuickBooks error code 20.
Here is the procedure for you;
- Close all the running program from your system , including the QuickBooks programs.
- Open ‘Control Panel‘, or go to the type bar to search for control panel.
- Visit the ‘Programs & Features‘ section, and locate the QuickBooks from the list.
- Click the ‘Uninstall‘ option to uninstall the QuickBooks.
- After that, download a copy of fresh QuickBooks version that compatibility with Windows 10.
- At last, restart your system to take place the changes.
You have uninstalled the QuickBooks, now update the Window:-
Follow the steps to update Windows-
- Click on the Windows button and open Settings.
- Open the ‘Update and Security‘ .
- Select Windows Update and check if any updates are pending. If yes, download the install. The installation process will automatically begin.
- Now, reboot your system.
- In the end, check if the error still persists.
Solution 3: Repair QuickBooks PDF Components
- Open your Windows Control Panel and go to the Programs and Features.
- Choose QuickBooks from the list of installed programs.
- Now, click Change and start the repair process and follow the instructions till the end.
- Restart the computer after the QuickBooks repair process is complete.
- To verify, try to print something or save a PDF.
Solution 4: Configuring Print Spooler Service
- First, press Windows + R keys at the same time and type MSC in the Run Box.
- After that, right-click on the Print Spooler Service from the list and choose Properties, and select stop the Print Spooler Service.
- From the startup type drop-down, choose Automatic
- Now, click on Start Service again.
- Finally, try to save a PDF or print something in order to verify.
Solution 5: Enabling UAC From Monitoring Windows Application
- First, press Windows + R key and type Control Panel in the Run Window.
- Now, click Ok and select User Accounts under Control Panel.
- For the next step, the user has to select the change user access control settings and then, select never to notify.
- Finally, click OK and reboot your system.
Solution 6: Troubleshooting Microsoft Document Writer – Windows Component
Microsoft Document Writer is a preinstalled Windows component that helps to print the file. This enables Windows to assist the QuickBooks application to save information in PDF format. If this component is missing or damaged, you will end up with a printing problem in QuickBooks on Windows 10.
- Right-click the QuickBooks icon on your desktop and choose the Open File Location option from the menu.
- Go to the Temp folder and look for the folder that represents your version of QuickBooks.
- Open the third-party folder.
- Locate and double-click the .exe file and complete the installation.
- Open QuickBooks once to register a license.
- In case of a problem installing the ABS PDF driver or it stops responding, try installing again.
- Once the installation is complete try printing again to verify the QuickBooks error code 20.
Final Thoughts
Hopefully, now you can fix the QuickBooks error 20 easily by ownself. We have tried our best to provide you the tested methods to the printing problem in QuickBooks. Still if you are seeking for help then, you can get help of our QuickBooks ProAdvisor to resolve your problem in a short time.