
If you use QuickBooks Enterprise there is a golden feature of Advanced Inventory in your awesome Software. By using Advanced Inventory you can track your inventory at multiple locations. YES!! Your business accounting has become much easier now. When you purchase or subscribe to Advanced inventory in QuickBooks Enterprise, you will be able to use these features given below after you turn on advanced inventory:
- Sales order fulfillment process (Site Operations)
- Bar code scanning
- FIFO costing
- The bin or lot tracking
- Multiple location inventory
- Serial or lot numbers
Why to Use Advanced Inventory
You can subscribe or purchase the add-on Advanced Inventory in Quickbooks Enterprise. To take advantage of this add-on feature you need to turn it on and then set it up. When you turn on advanced inventory you will be able to track inventory stored at different sites or locations. This has many more advantages, have a look-
- Barcode scanning.
- Track inventory at multiple locations.
- Customizable inventory reports.
- Real-time inventory picking.
- Tracking by serial or lot numbers.
- Easy inventory transfer from one location to another.
- Makes sure your inventory quantity on hand by the site is accurate.
- Store inventory at different warehouses.
- Stores them in different areas within a warehouse.
- Customers can store them at consignment locations or outside manufacturers.
Steps to Turn On Advanced Inventory in QuickBooks
- Select Preferences, from the Edit tab.
- Select Item & Inventory from the left panel.
- Go to the Company Preferences tab.
- Check the Inventory & Purchase Orders are Active box.
- From the Settings button select the Advanced Inventory. If the button is grayed out even though you have purchased the feature, you will need to sync license data online so that QuickBooks recognizes it.
- In QuickBooks, select Help then Manage My License, and then Sync License Data Online.
- Check that Advanced Inventory Settings is no longer grayed out.
- Close and re-open the QuickBooks program.
If the Sync Fails During Turning On the Advanced Inventory
If Syncing fails on some but not all computers, there may be system-specific problems. Therefore solve the issue follow the troubleshooting steps (Note: These steps are for the Windows Operating system, which is not an Intuit product). We suggest you take the help of an IT professional or expert because it can become complex if errors occur while repairing or uninstalling the .Net Framework. Otherwise, you might end up with a bigger problem. So to fix the issue-
- Select the program problems.
- Select Quick to fix my problem.
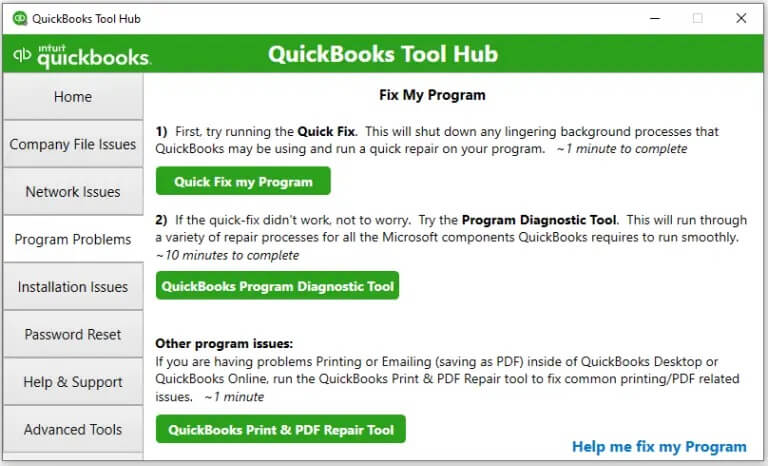
- Choose the Quickbooks Program diagnostic tool.
- This will probably fix your issue.
Steps to Set Up QuickBooks Advanced Inventory
After successfully turning on the Advanced Inventory you need to set it up as well. Follow the procedure to do so-
Step 1: Set Up The Inventory Sites
The first step to track multiple inventory sites is to tell QuickBooks Desktop where you track inventory is. These sites can be warehouses having different addresses, trucks, or staging areas. These can be large or small.
- In the lists, the menu selects the inventory site list.
- Select New on the site button.
- Enter the relevant information.
Step 2: Conversion Of Tracking Inventory Sites
People use various methods to follow the tracks of multiple inventory sites. Before using multiple inventory sites, you need to assure that your inventory numbers are correct so you can comfortably change to using the Advanced Inventory.
Hanging on to your current method, you may need to take supplemental steps to switch to Advanced inventory. For detailed knowledge, locate your current method from the list, if it is not listed look at the option “You Use Another Method”.
People use various software for example Excel to follow inventory at multiple sites.
With this process, you can use different software to track how much stock you have at each site.
To Switch To The Advanced Inventory Method:
- By using the other software, you can run a report to identify the quantity on hand at each site.
- Set up the inventory items in QuickBooks if they are not.
Creating Separate Items For Each Site.
With this technique, you utilize a naming strategy or structure to recognize things at various locales. For instance, on the off chance that you have 3 stockrooms, you utilize 3 things to speak to a similar thing situated at each distribution center.
Steps To Switch To The Advanced Inventory Method
- Ascertain the amount close by (QOH) for everything at each site. You ought to likewise know the worldwide QOH (the all-out amount overall sites ). Record these numbers or print a report from QuickBooks.
- “Clean up” your item list. The objective is to have just a single thing on the rundown for everything you sell.
- Choose which things to use later on. Keep in mind that you just need one thing in QuickBooks Desktop. In the model above, assume you pick WH1 Widget 1.
- Alter the amounts to zero for the repetitive things you won’t utilize. At that point make the comparing increment for the item that you will utilize. For example–
- Decreases WH3 Widget 1 from 40 to 0 for the QOH
- Increases WH1 Widget 1 from 100 to 160 for the QOH
- Decreases WH2 Widget 1 from 20 to 0 for the QOH
In the wake of making all alterations, the net impact on the change record ought to be zero. In any case, if everything that speaks to a similar thing in various areas has diverse normal costs, the net impact won’t be zero. There are 2 different ways to deal with this issue.
If The Value Differences Are Small
Converse with your bookkeeping proficiency. If the worth contrasts are little, an uncommon stock modification represents this exchange and makes your alteration. At that point have your bookkeeping expert discount this sum.
Other Useful Resources:
How To Print A Simple Check Register In QuickBooks?
If The Value Differences Are Important
Note the estimation of these alterations for the subsequent stage.
- Alter the amount of the item you are keeping. Increase the estimation of the modification by the sum you noted in the step above.
- In the Inventory, select the adjusted quantity/value on hand
- In the Adjustment Type drop-down, select the Quantity and Total Value.
- Select the account you normally use in the Adjustment Account dropdown.
- Go to the inventory site drop-down and select the inventory site you set as default when you turned on the Advanced Inventory.
- Move to Add Multiple Items and select the items that represent the same item across multiple sites
- Enter 0 in the New Quantity columns where the rows that contain the redundant items(the ones you’re NOT keeping)
- For all these redundant items, calculate the total of the QTY Differences.
- For the rows that contain the item you are keeping, add the quantity derived from step 7 in the Qty Difference column.
- In the New Value column set all the values to 0.
- In the bottom right of the window note down the total value of the Adjustment amount.
- Enter the amount you noted in step 10 from the New Value column. The total value of Adjustment should now be 0.
- Click on Save & New and repeat all these steps for the next set of items.
Step 3: Reorder Points For Each Site (Optional)
With the Advanced Inventory, you can track site-explicit reorder focuses on everything. This implies you can have an alternate reorder point for each site, and QuickBooks Desktop can caution you when you’re running low at a particular site.
- In the Lists select the Inventory Site List
- Select Set Reorder Points in the Activities drop-down.
- Click on the Set Reorder Point for site drop-down arrow and select the site you want to set a reorder point for.
- In the Site Reorder Point column, for each item enter the reorder point.
- Select the Set to Reorder Point from the drop-down arrow and select another site to set Reorder points for other sites.
- Select OK.
Step 4: Move Opening Amounts Of Items to Each Site
When you turned on the Advanced Inventory, QuickBooks Desktop incited you in the first place a solitary, brief beginning site. Thus, QuickBooks Desktop demonstrates that your whole stock is put away at one location.
Now you can easily transfer your inventory from the starting site to their actual sites. For having these steps you need current inventory counts for each site.
- For Transfer Inventory go to the Inventory menu.
- Enter the date of the transfer in the Date Field (this can be the date you begin tracking multiple sites).
- Enter the relevant transfer number in the Reference No. field.
- Go to Transfer from the drop-down to select your temporary inventory site.
- For an actual inventory, the site clicks the To Drop-Down menu.
- To transfer to the site select the inventory items.
- To transfer for each item enter the number in the Qty to Transfer column.
- Enter the reason for this transfer in the Memo Field. (Optional)
- If you need a printed copy of the transfer select Print.
Step 5: Add A Site Column To Your Printed Sales And Purchase Forms (Optional)
A site section shows up on all structures (solicitations, buy orders, etc) you see onscreen. Be that as it may, this segment doesn’t show up when you print the structure.
You can make a form template according to your template so you can add or remove columns:
- Open the Sales or Purchase form.
- For customizing the Data Layout go to the Formatting.
- Select the columns to tab from the Additional Customize window.
- Put a checkmark in the box for the inventory site in the Print column.
- Select OK.
The advanced inventory tracks either inventory store from a different site or different location. For example, if you store the inventory from the different warehouses, either in the multiple tracks or different areas within a warehouse at the different consignments and locations or from the outside manufacturer, it can easily manage your inventory in your business. If you want to use this feature then you have to buy advanced inventory or you have a license that includes this advanced feature in this subscription.
Here, we have a video for you. That will help you to use the Advanced inventory setting in QuickBooks Desktop Enterprise. Have a look;
After applying these steps given above you can turn on advanced inventory and use its features. If you need help and have any confusion about applying these steps or are still unable to turn on advanced inventory then call our toll-free QuickBooks Enterprise support number to get connected to our support team. You can also contact us if you want any information about Quickbooks.