
Inventory items are those that your business has in stock. In this, we are going to discuss how we can set up and track inventory in QuickBooks. Let’s take an example, if you have a medical store, you can easily track your medicine with the help of a unique number or scanning barcode that has printed on medicine and you can easily find out all the information about any medicine. With this software, you can easily make a record of your tracked inventory like which type of inventory is left out by this app. You can easily make a prediction for the future for the development of your business.
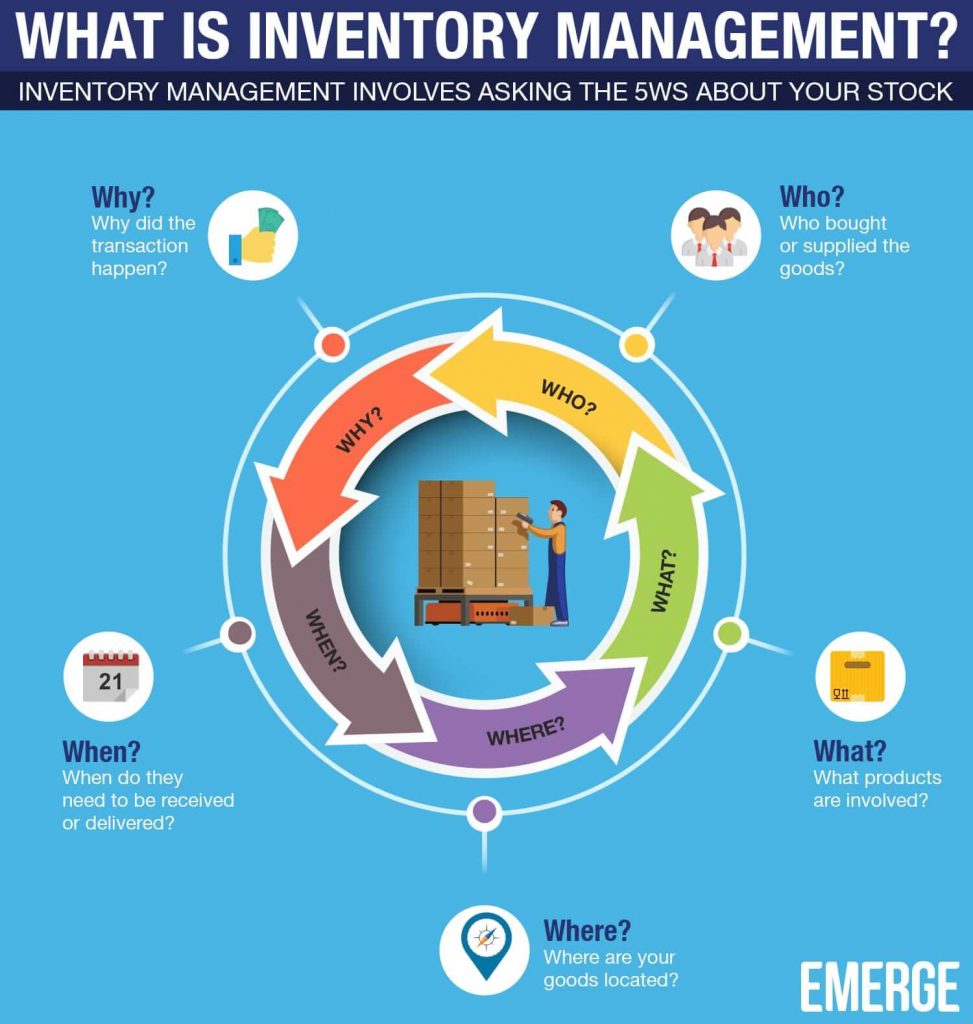
The tracking system will help you to stay up to date in your stock management and you can ensure fulfilling any pending or upcoming customer orders. It can also determine whether you are making money or losing money on each product. So you can make balanced business decisions which will make you profit.
Set Up & Track Inventory in QuickBooks Online
QuickBooks Online got everything you need to manage your inventory. Track what you have now, get a notification when it’s time to refill your stock, and see insights on what you buy and sell.
Step 1: Turn on Inventory Tracking
Follow the procedure to turn on the inventory tracking;
- Go to Settings, and select Account and Settings.
- Select Sales.
- Select Edit in the Products and service section
- Turn on Show Product/Service column on the sales forms
- You can also turn on your price rules if you want to set up flexible pricing for the things you sell
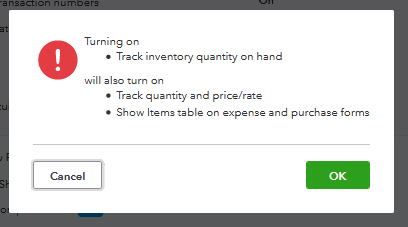
- Turn on both Track quantity and price/rate and track inventory quantity on hand
- Select Save and Done.
Step 2: Add Inventory Products
In the next step, add the inventory product;
- Include the service you provide to your customer
- Add non-inventory items. These are settings you buy or sell but don’t track as your inventory
- Create a bundle for any collection of products or service that you sell together.
Step 3: Keep track of what you sell & Refill Inventory
- Create an invoice, if you’ll get paid later.
- Add a sales receipt, if your customer paid on the spot
QuickBooks reminds you when you have to refill your stock, you can also order your inventory in QuickBooks. Then track what you receive from vendors and what is still on order. When you do, the Quantity on hand automatically increases by the number you items you receive. Then, use a report to check the status of your inventory.
Here we have a video suggestion for you, by which you can get the live setup procedure of inventory tracking. Have a look;
Steps to Track Inventory Manually
If you want to track your inventory manually using QuickBooks, then follow the below procedure;
Step 1: Create an Account (To Track Inventory Value)
Try creating an account for each type of inventory if you want. For example, if you sell used male garments and female garments, you’d create an account for male garments and another for female garments.
- Click on the Gear icon at the top, then choose Chart of Accounts.
- Tap on New.
- Choose Current assets from the Account Type drop-down.
- Select Other current assets from the Detail Type drop-down.
- Enter a unique Name (system default will be Other current assets), Description, Default Tax Code, and Balance for the account. (optional)
- Tap on Save and Close.
Other Useful Resources:
Acrobat Reader- Steps To Update, Uninstall & Reinstall
Use Of Receipt Scanner For QuickBooks
QuickBooks Online Certification Exam Answers PDF (All Sections)
Step 2: Create an Account (To Track the Cost of Goods Sold)
- Tap on the Gear icon at the top, then Chart of Accounts.
- Choose + New.
- Choose Cost of Goods Sold from the Account Type drop-down.
- Tap on the closest type of Cost of Goods Sold that matches your situation from the Detail Type drop-down. If you’re not sure, use Other Costs of Service – COS.
- Enter a unique Name, Description, and Default Tax Code for the Cost of Goods Sold item. (It is Optional)
- Hit on Save and Close.
The Other Inventory Set-Up in QuickBooks
To add Non-Inventory in QuickBooks
- Select the Services & item and then click on the item button.
- Click on the new button after opening the new item window
- Select the non-inventory part of the menu.
- Enter all the non-Inventory items in the item detail box,
- Select the account to link the item from the account menu.
- In last you have to fill in all the required details which the system wants and after that
- Smash the Submit Button.
How to Track Inventory Parts
- Click on the QuickBooks setup option and let it open.
- Select the edit after that select preferences.
- Then click on Items and Inventory after that
- Select the company preferences option.
- Choose the inventory and purchase orders to enable the inventory tracking and then
- Smash the ok button.
- Select the items & service and click on the Item button.
- Do select new and then
- Select the Inventory Part from the drop-down list.
- Enter the inventory item name and fill in all the details. Click on the income account” drop-down list and select the account you want to use to track income from this inventory item.
- If still unable to do so, call our helpline number +1-844-405-0904 to get help with your query.
Create an Account (To Track Inventory Value)
Try creating an account for each type of inventory if you want. For example, if you sell used male garments and female garments, you’d create an account for male garments and another for female garments.
- Click on the Gear icon at the top, then choose Chart of Accounts.
- Tap on New.
- Choose Current assets from the Account Type drop-down.
- Select Other current assets from the Detail Type drop-down.
- Enter a unique Name (system default will be Other current assets), Description, Default Tax Code, and Balance for the account. (optional)
- Tap on Save and Close.
Create an Account (To Track the Cost of Goods Sold)
- Tap on the Gear icon at the top, then Chart of Accounts.
- Choose + New.
- Choose Cost of Goods Sold from the Account Type drop-down.
- Tap on the closest type of Cost of Goods Sold that matches your situation from the Detail Type drop-down. If you’re not sure, use Other Costs of Service – COS.
- Enter a unique Name, Description, and Default Tax Code for the Cost of Goods Sold item. (It is Optional)
- Hit on Save and Close.
Issues While Tracking QuickBooks Inventory
As we all know that QuickBooks is one of the best accounting software, anyone can use it to manage their business accounting and financial transactions. QuickBooks also offers you the features of inventory tracking but there are certain issues with it which are mentioned below-
- QuickBooks not best for inventory management
The software is built to fulfill the accounting needs of small and medium-sized businesses and hence it was its main purpose. Inventory management was just an additional feature introduced by them. So, it’s just not the best software you can get for inventory management. You might need additional programs to fill in the gap. But if you use QuickBooks inventory management, then you can integrate with QuickBooks transactions very easily.
- The limitations increase with the scale of business
If your business is growing every day and your business is on a large scale business you might find QuickBooks Inventory management inadequate for you. There are so many limitations as your business grows. QuickBooks Enterprise promises to be enough for Large scale businesses but it also offers only a maximum of 1GB. There are more limitations like that. Make sure it’s adequate for you.
- Scope for human error is there
Although the QuickBooks Inventory management reduces the occurrence of errors. Which saves time, money, and resources for your organization. Don’t forget that there is still scope for human error in it.
- Limited inventory analytics and reporting.
As we have already discussed earlier QuickBooks software is not mainly built to set and track inventory management. Its main purpose is to handle your business accounting activities therefore it only offers limited inventory analytics and reporting. You may consider some other applications.
In this blog, you can find set up and track inventory in QuickBooks. We hope that all information is useful to you. If you don’t understand any steps you can contact us.